Rising microgreens is often simple, however as with every gardening, you would possibly encounter a couple of hiccups. Under are some frequent microgreen rising issues small-scale growers face and the right way to tackle them. Don’t be discouraged in case you run into one in every of these points – with a couple of changes, you’ll be again on observe very quickly.
Mildew or Fungus Progress
What it appears like
You would possibly see white, fluffy mould rising on the soil floor or across the stems, often accompanied by a musty scent. It typically seems when situations are too damp and stagnant.
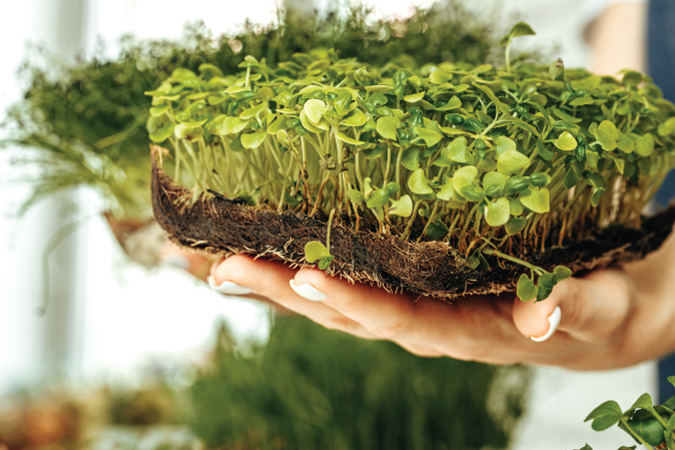
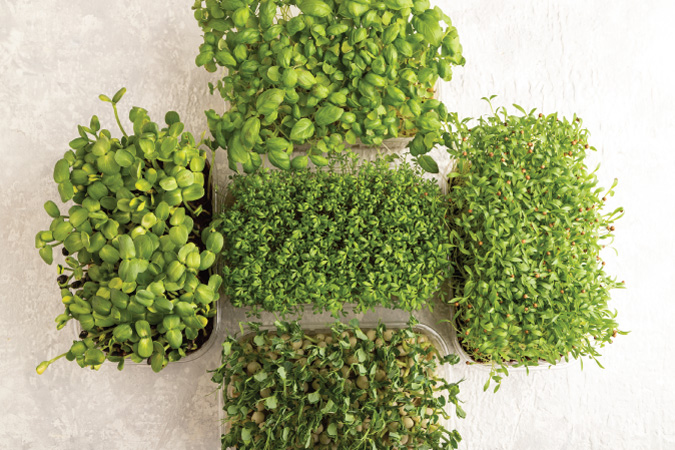
It’s essential to not confuse mould with the fragile white root hairs that some microgreens (radish, broccoli) naturally produce close to the roots—these seem like white fuzz. Under is an instance of root hairs.
These tiny root hairs are a part of the plant and often seem uniformly alongside the foundation, particularly when the medium is dry. Mildew, then again, tends to type patches on the soil or in densely seeded areas and will be greyer and extra web-like.) True mould will unfold if unchecked and may kill or make your seedlings rot.
Causes: Extra moisture and poor airflow. Overwatering, particularly from the highest, or leaving a humidity dome on for too lengthy can create a mold-friendly surroundings.
Excessive temperatures (above ~75°F) additionally encourage fungal development.
Overseeding to the purpose of maximum crowding can cut back airflow round stems and entice moisture, encouraging mould. Utilizing unsterilized backyard soil may introduce mould spores, although most spores are ambient anyway.
Prevention and Options
One of the best remedy is prevention:
- Air circulation: As emphasised, take away covers as quickly as attainable and use a fan if wanted. Even briefly fanning the trays by hand every day will help.
- Water correctly: Water from the underside as soon as seeds have sprouted to maintain the floor dryer. Should you should high water, do it early within the day so moisture evaporates. By no means let the medium change into swampy.
- Temperature management: Hold the rising space within the really helpful vary (65–75°F). If it’s scorching, you should compensate with extra airflow.
- Cleanliness: Wash trays between makes use of. Begin with recent, sterile soil for every crop. Use clear water.
- Should you see a small mould patch, act rapidly. You’ll be able to take away that part of seedlings and soil solely to cease the unfold. Bettering air circulation instantly typically halts it. Some growers evenly mist affected areas with a dilute hydrogen peroxide resolution (food-grade 3% H₂O₂ diluted 1:10 with water), which might kill floor mould—however use sparingly and keep away from soaking the greens.
- Cut back seeding density barely in your subsequent spherical of microgreens if mould is a persistent problem. Overcrowding can contribute to the expansion of fungus.
Don’t be too dismayed—mould is without doubt one of the most typical points when rising microgreens, nevertheless it’s very manageable when you dial within the watering and airflow. Rising microgreens at dwelling has the benefit of permitting you to watch your trays steadily.
Leggy or Floppy Microgreens
What it appears like
“Leggy” microgreens have abnormally lengthy, skinny stems and infrequently fall over as an alternative of standing upright. They might additionally look pale or yellowish. You would possibly discover they’re a lot taller than anticipated and really delicate.
Causes
Inadequate gentle is the first explanation for leggy microgreens. When sprouts germinate and don’t get sufficient gentle depth, they stretch taller and taller, on the lookout for it. This may occur in case you delay uncovering them for too lengthy – they develop at the hours of darkness and change into spindly (which some individuals deliberately do for particular varieties, however it’s usually not desired.
It additionally occurs in case your gentle supply is just too weak, too far-off, otherwise you’re rising in a dim location. One other trigger will be excessive warmth—if temperatures are too heat, they develop too quick and skinny. Overcrowding may also trigger some stretching as they compete upward for gentle and house.
Options
- Give ample gentle early: When most seeds sprout, instantly put them below good lighting. Don’t maintain them coated in darkness past the really helpful time. If utilizing window gentle, guarantee it’s a vibrant window (south or west-facing) or complement with synthetic gentle, particularly on cloudy days.
- Distance and period: If utilizing a develop gentle, place it nearer to the crops. A weak window gentle that’s far-off will trigger stretch; as an alternative, set trays proper as much as the window glass (being aware of temperature).
- Present at the least 12 hours of sunshine a day, as much as 16 hours for people who want it. Should you discover seedlings leaning closely in direction of the window, that’s an indication they need extra gentle. You’ll be able to rotate trays every day for even development and think about boosting utilizing synthetic gentle.
- Temperature: Guarantee it’s not too scorching. Rising microgreens at cooler room temps (round 65°F) can produce stockier development than at 80°F.
- Resow if wanted: Sadly, as soon as microgreens have gotten very leggy and flopped, they received’t thicken up. You would possibly nonetheless salvage them to eat, nevertheless it’s an indication to regulate for the following batch. Studying from it, you would possibly sow much less densely and light-weight them higher. Legginess is often a simple repair, because it is supplied with stronger gentle instantly after germination in future makes an attempt.
Poor or Uneven Germination
What it appears like
You sowed a thick layer of seeds, however solely a portion sprouted. You see naked patches within the tray the place seeds didn’t germinate or many seeds taking for much longer than others to develop. This leads to a thinner yield or tray sections maturing at totally different occasions.
Causes
The high quality or viability of the seed is a major issue – previous or improperly saved seeds could have low germination charges.
Planting approach may also trigger points: if seeds weren’t in touch with moist soil (for instance, some sitting on a dry clump or not pressed in), they won’t germinate effectively.
One other frequent trigger just isn’t protecting the seeds moist sufficient within the first few days—in the event that they dry out at any level throughout germination, many won’t sprout.
Lastly, chances are you’ll must seed heavier on the following spherical. Utilizing too few seeds will lead to a patchy crop.
Temperature performs a job: if it’s too chilly, germination shall be gradual and uneven; whether it is too scorching, some seeds could rot. Additionally, some bigger seeds (peas, sunflowers, beets) naturally have extra staggered germination until pre-soaked.
Lastly, depth – microgreen seeds ought to usually be sown on the floor or barely coated. Should you buried some (both accidentally or they bought pushed below an excessive amount of soil), they may battle to emerge.
Options
- Use recent, high-germination seeds: Buy from respected suppliers and verify if the bundle has a check date. Should you suspect your seeds are previous, strive a fast germination check on a moist paper towel with a couple of seeds to see how they do. Beginning with high quality seeds avoids lots of complications. Our favourite microgreen seed provider is True Leaf Market. https://www.pntra.com/t/SUNHSU9ORk9DR05KT0tKQ0dLSUdOSw
- Soak seeds that want it: For peas, sunflowers, chard/beet, nasturtium, and so on., soaking 8-12 hours earlier than sowing can significantly enhance uniformity by dashing up germination. It softens their seed coat and wakes them up.
- Keep even moisture throughout germination: Mist at the least a few times a day to maintain the highest layer from drying out () (). Utilizing a canopy or humidity dome helps right here, however keep in mind to take away it instantly.
- Guarantee contact: After sowing, press the seeds into the medium so every has contact with one thing moist (). Should you discover lots of seeds nonetheless sitting dry on high after a couple of days, that’s seemingly the problem.
- Temperature candy spot: Most microgreen seeds germinate greatest round 70°F. In case your house is chilly (say under 60°F), think about a seedling warmth mat below the tray for the primary few days to enhance germination. Conversely, transfer to a barely cooler spot in case you’re germinating on a heat equipment or scorching space.
- Even distribution: Attempt to broadcast seeds as evenly as attainable when sowing. Uneven seeding can result in clumps (the place seeds could keep too moist and decay) versus naked spots (the place possibly they dried out). Observe will enhance your approach – you may divide your seeds into two parts and sow half over the tray at a time, crisscrossing instructions to attain higher protection.
Should you get an uneven tray regardless of all this, you may nonetheless harvest what grew. Subsequent time, you would possibly modify by sowing a bit extra densely to account for any no-shows or troubleshoot the seed supply.
Yellowing or Wilting Microgreens
What it appears like
As an alternative of vibrant inexperienced, the microgreens look pale or yellow or begin to droop even when not that tall. This may occur in patches or general.
Causes
Lack of sunshine may cause yellowing (crops want gentle to show inexperienced). In the event that they stayed yellow lengthy after being uncovered to gentle, they seemingly aren’t getting sufficient depth or hours of sunshine.
One other trigger is nutrient deficiency, however within the quick microgreen lifespan, that isn’t a problem until you’re rising them longer than 2 weeks (the seed’s vitamins usually suffice for 10-14 days.
Should you attempt to develop a microgreen previous its preferrred harvest (for instance, going into 3-4 weeks), it would yellow because it exhausts the seed vitality, and there are not any vitamins in a soilless medium—however often, you’d harvest earlier than that.
Wilting may very well be from underwatering (they dried out)—microgreens have tiny roots and may flop rapidly if thirsty. Conversely, wilting may also happen from rot on the base (damping off) if overwatered and contaminated.
Options
- Enhance or enhance the lighting for normal yellowing. As soon as true leaves seem, if they give the impression of being yellowish, some half-strength diluted natural fertilizer can inexperienced them up—however most microgreens don’t require fertilization in such a brief develop, so that is extra for longer-grown shoots. Make sure you’re harvesting on the proper time; letting them linger with out vitamins may cause a pale coloration.
- If wilting, verify the moisture of your medium. If bone dries, instantly water (backside water or mild mist), they usually typically perk again up if not too far gone. If the medium is moist and stems are collapsing on the base, you might need to damp off (a fungal problem) – in that case, salvage what you may harvest and discard the remaining, then assessment the mould prevention suggestions for subsequent time. Correct airflow and never overwatering are key to stopping stem rot (damping off).
- Typically, microgreens tilt or wilt just because they outgrew their help—e.g. in the event that they bought leggy. In that case, it’s an environmental problem (gentle/house).
- Should you see cotyledons (seed leaves) yellowing whereas the true leaves are coming in inexperienced, that’s regular. The plant transfers vitality and doesn’t want these seed leaves for much longer.
By troubleshooting on this manner—observing your microgreens every day and adjusting—you’ll rapidly be taught the fitting stability of water, gentle, and density.
Each dwelling surroundings is a bit totally different, so don’t fear if it takes a batch or two to dial it in. The great factor is that microgreens develop so quick that even in case you make errors, you may strive once more virtually instantly and apply what you realized.
A Inexperienced Thumb in Tiny Areas
Rising microgreens indoors is rewarding for any homesteader or Gardner. You don’t want a yard or perhaps a balcony—simply indoor house and a DIY spirit. In a matter of days, you may go from seed to salad, snipping flavorful greens in your kitchen counter.
For members of The Develop Community and self-reliance fans, microgreens provide a high-nutrition crop that enhances your homegrown meals provide year-round, even when out of doors gardens are out of season.
What’s terrific is how scalable that is. Begin with a tiny tray of radish microgreens on a windowsill. When you style the distinction and see how straightforward it may be, you would possibly end up with a whole shelf of trays below a develop gentle, producing a range of micros every week. They’re that addictive – in a great way!
Microgreens align completely with sustainable dwelling: you may reuse provides, compost the leftovers, and dramatically cut back waste (no extra shopping for plastic clamshells of greens that spoil within the fridge).
Conclusion
As a newbie or intermediate grower, don’t be afraid to experiment. Strive new seed varieties, style your greens at totally different development phases, or check rising in soil vs. coco coir. This information has given you the basics, however be happy to innovate and adapt to what works greatest in your house. The DIY ethos is robust in microgreen rising – many individuals devise intelligent setups with repurposed furnishings as rising racks or automated watering for comfort. You would possibly discover pleasure within the harvest and nurturing these little crops.
We hope this complete information units you up for achievement. To recap the necessities: begin with good seeds, keep a clear, moist surroundings for germination, give loads of gentle and air as they develop, and harvest on the proper time. With these factors in thoughts, you’re effectively in your option to producing a continuing provide of nutrient-dense microgreens, even within the tiniest houses.
Now, go forth and get rising! Your selfmade microgreen salad (or smoothie or sandwich topper) awaits. And as you crunch on these homegrown greens, you may actually savor the fruits (or moderately, greens) of your labor – a small however highly effective step towards higher self-sufficiency and wholesome, homegrown consuming.
Learn Extra on this Sequence:
A Newbie Information to Rising Microgreens
The Prime 5 Best to Develop Microgreen Varieties for Rookies
Harvesting and Storing Microgreens
Our Favourite Microgreens Provider:
(Visited 246 occasions, 9 visits right now)


