Have you ever ever thought of rising contemporary, nutritious meals inside? If the reply is sure, then microgreens may be your excellent crop.
This information explores how small-space homesteaders – even these in flats or condos – can simply develop a bounty of microgreens indoors. From understanding what microgreens are and their well being advantages to organising your rising space, planting, harvesting, and troubleshooting, this information will stroll you thru your complete course of beginner-friendly.
Let’s flip that sunny nook of your private home right into a mini indoor farm!
What Are Microgreens?
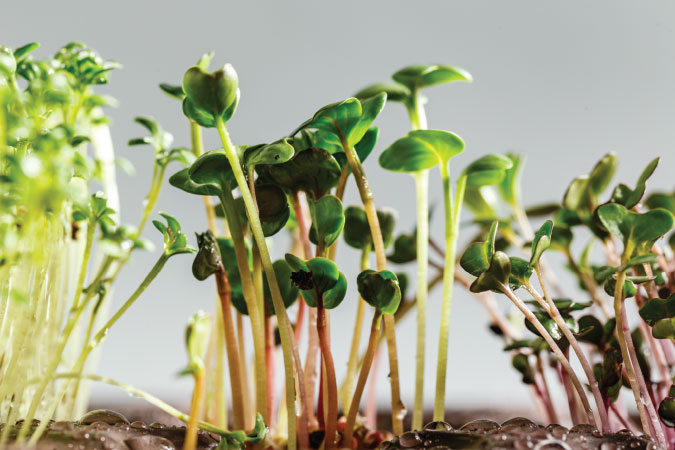
Microgreens are younger vegetable greens harvested simply after the seed sprouts and the primary set of leaves (known as cotyledons) have developed. They’re basically tiny variations of the vegetation they’d develop into, normally clipped when only one–3 inches tall and only a week or two outdated.
Please don’t confuse them with sprouts! Sprouts are germinated seeds eaten earlier than true leaves type, typically grown in water. Microgreens, in contrast, are grown in a skinny layer of soil or different medium and uncovered to mild so that they develop leaves. This additional rising time offers microgreens richer colour, taste, and vitamin than sprouts.
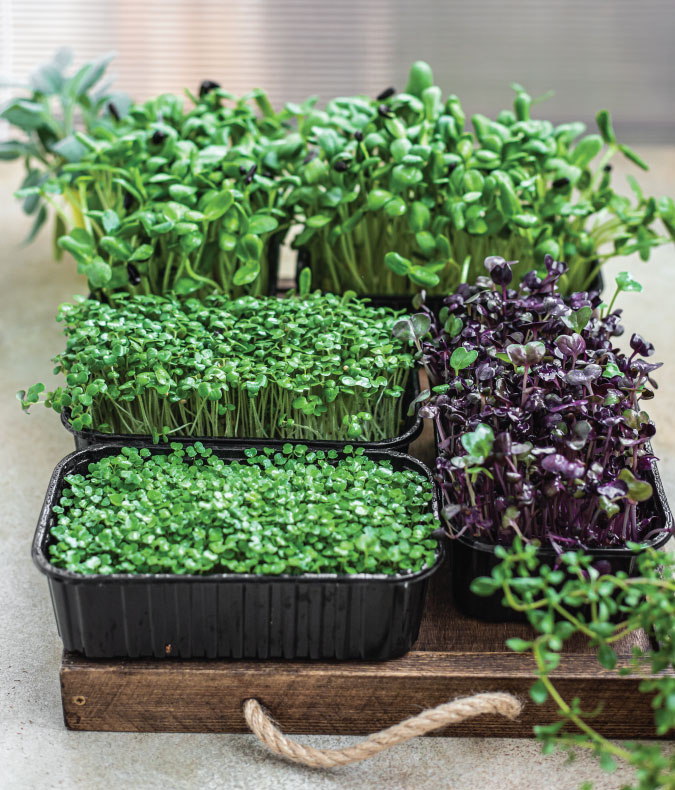
Microgreens can come from varied greens and herbs – from radishes to basil to broccoli. If the plant has an edible leaf or stem, you possibly can eat it as a microgreen. Standard varieties embrace radish, broccoli, mustard, pea shoots, sunflower, kale, and lots of extra.
Every kind has its personal taste: for instance, radish microgreens are spicy, pea shoots are candy, and mustard greens pack a zingy chunk. These tiny greens aren’t simply garnishes for fancy restaurant dishes – they’re a sensible, straightforward crop you possibly can develop year-round in your house.
Dietary Advantages of Microgreens
Microgreens have earned a “superfood” fame due to their nutrient density. Analysis reveals that microgreens typically include larger concentrations of nutritional vitamins and antioxidants than their mature plant counterparts.
In reality, a examine by the U.S. Division of Agriculture discovered that, on common, microgreens had about 5 occasions extra nutritional vitamins (like vitamin C, vitamin E, vitamin Ok and beta-carotene) than absolutely grown leaves of the identical vegetation (Specialty Greens Pack a Dietary Punch : USDA ARS) (Specialty Greens Pack a Dietary Punch : USDA ARS).
One other college examine famously reported microgreens can pack 4 to 40 occasions the nutrient ranges of the equal mature greens, relying on the precise nutrient and plant selection (Mighty Microgreens | School of Agriculture & Pure Sources at UMD).
Which means a small handful of broccoli microgreens might ship a much bigger burst of nutritional vitamins than a complete head of broccoli!
These tiny greens are significantly wealthy in antioxidants – compounds that assist our our bodies neutralize dangerous free radicals. For instance, broccoli household microgreens (Brassicas) are famous for being excessive in vitamin E, a strong antioxidant. Microgreens from the carrot household (like dill or fennel) are typically excessive in vitamin A carotenoids.
What does this imply for you?
Together with microgreens in your weight loss plan may help bolster your consumption of important nutritional vitamins and minerals (comparable to vitamin C, Ok, and iron) and plant compounds that assist total well being. Some early analysis even suggests microgreens might help in managing situations like diabetes and coronary heart illness because of their concentrated vitamins and antioxidants. Although consuming them is just not a cure-all, it’s definitely a wise approach to enrich your weight loss plan with homegrown produce.
In brief, microgreens provide massive vitamin in a small bundle. They allow you to “eat your greens” in a handy, home-grown type. Plus, since you eat them uncooked (e.g. in salads, sandwiches, or smoothies), you keep all these delicate nutritional vitamins that may be misplaced in cooking.
It’s arduous to discover a draw back to those mini-greens: they’re tasty, lovely on the plate, and filled with goodness.
Preferrred Indoor Rising Circumstances
Microgreens are splendidly forgiving and designed for indoor cultivation – however offering the suitable situations will make sure you get a wholesome, ample crop. Right here’s what microgreens love by way of mild, temperature, and humidity:
Mild Necessities for Microgreens:
As soon as germinated, microgreens want loads of mild to develop sturdy and inexperienced. A vivid, sunny windowsill can work (south-facing is finest), however keep away from harsh, direct noon solar by glass, which may overheat or dry out your seedlings.
Oblique daylight or gently filtered mild is good. If pure mild is restricted (widespread in winter or small flats), a easy synthetic develop mild shall be your finest pal. Microgreens don’t require huge, high-powered lamps – even an inexpensive LED or fluorescent develop mild can present the 8–12 hours of sunshine they want every day. Place the sunshine just a few inches above the greens for finest outcomes (the additional the gap, the extra they may stretch and get “leggy” reaching for mild). Many growers use a timer to provide about 12–16 hours of sunshine every day, mimicking lengthy summer season days. Keep in mind, satisfactory mild is essential to stop pale, spindly microgreens.
Temperature Necessities for Microgreens:
Microgreens are snug in the identical temperatures people are. Goal for room temperature round 65–75°F (18–24°C) for optimum progress. Most varieties germinate quickest on the hotter finish (round 70–75°F) and develop properly within the mid 60s°F. The excellent news is you doubtless already preserve your private home on this vary. Keep away from extremes – if it drops a lot under 60°F, germination and progress will sluggish; a lot above 80°F, you can encourage mould or “damping off” fungus within the dense seedlings. A secure, average temperature will preserve your microgreen “backyard” blissful. For those who’re snug in a t-shirt, your microgreens most likely are, too.
Humidity & Airflow:
Microgreens respect a little bit of humidity, particularly throughout germination, however an excessive amount of could cause fungus issues. Goal for average humidity (50–60%) in your rising space. Once you first sow seeds, it helps to lure moisture by overlaying the tray with a lid and even plastic wrap – this creates a mini-greenhouse to sprout seeds quicker. However as soon as most seeds have sprouted, take away any cowl to enhance air circulation.
Good airflow is the enemy of mould – you don’t need stagnant, overly damp air sitting in your crop. In case your rising spot is in a closed, nonetheless space (like a basement nook), think about using a small fan close by to maintain the air gently shifting. This delicate breeze will strengthen the seedlings and stop that fuzzy white mould from selecting them. In brief, preserve the soil moist however not soggy, and provides your microgreens some “contemporary air.” We’ll speak extra about avoiding mould within the troubleshooting part, however correct humidity and airflow from the beginning make an enormous distinction.
In abstract, discover a spot in your house that’s room temperature, with vivid mild (or use a develop lamp), and never too stuffy. Microgreens are adaptable—they don’t want excellent greenhouse situations to thrive. Offering the fundamentals of sunshine, heat, and water in your indoor micro backyard will reward you.
Step-by-Step: Rising Microgreens Indoors in a Small Area
Now, let’s get our palms soiled! Beneath is a step-by-step information tailor-made for small-space homesteaders. You don’t want fancy tools – many growers begin with recycled containers and a bag of potting combine. We’ll go from setup to reap:
1. Collect Containers (Trays) and Prep Your Area:
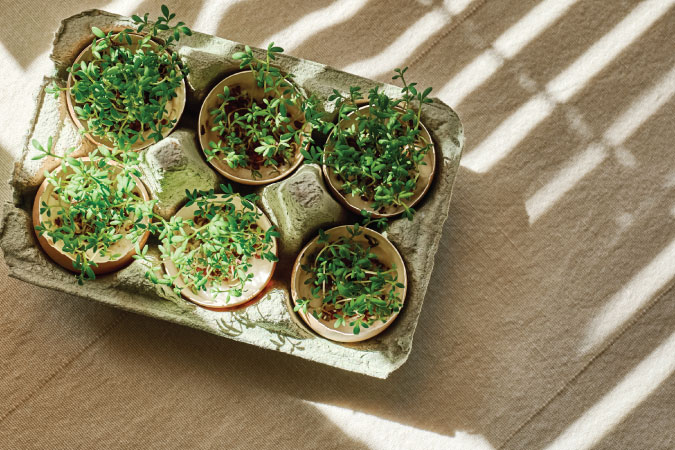
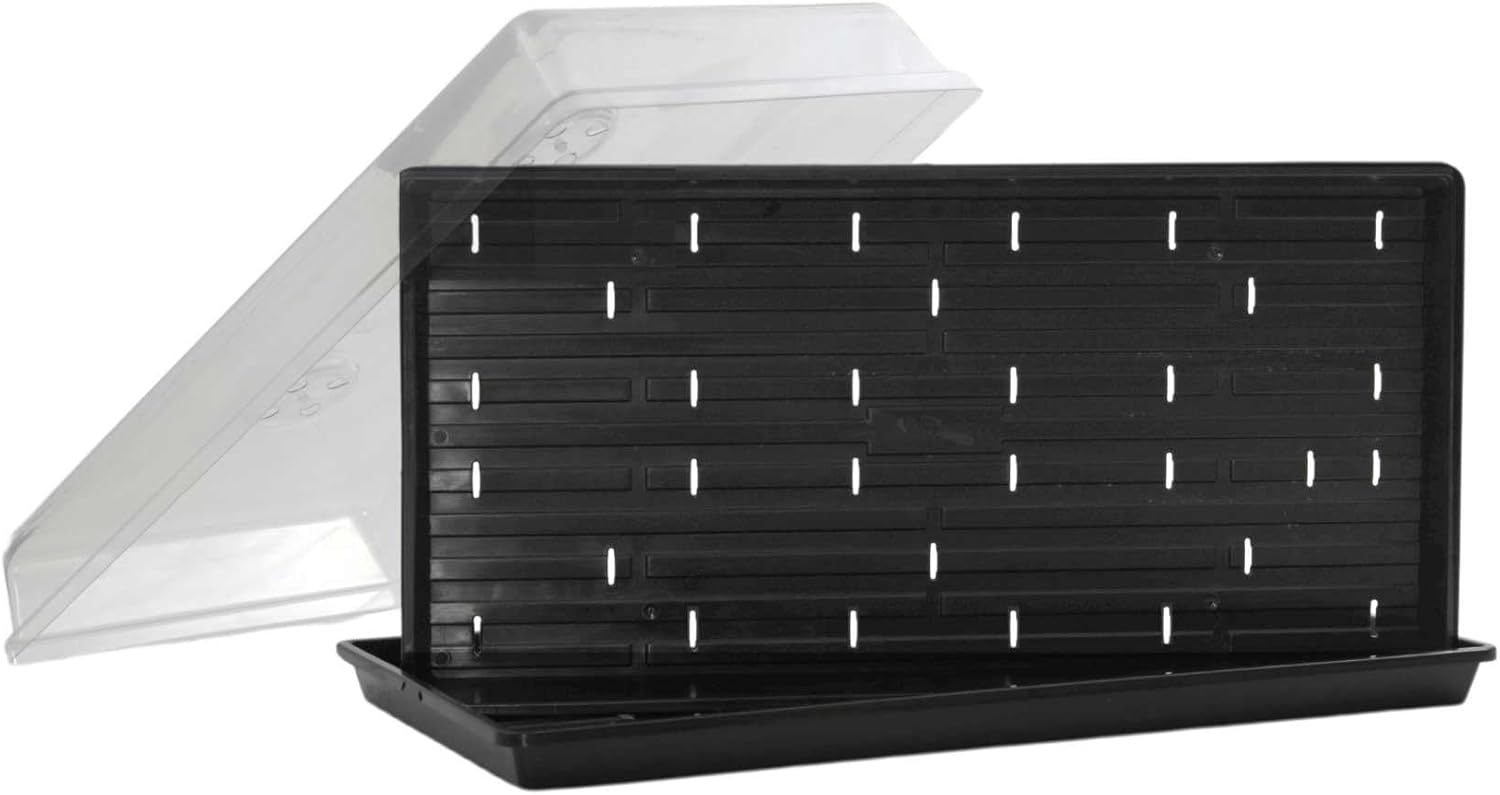
Select a shallow container to develop your microgreens. It may be a purpose-made nursery tray or one thing repurposed (outdated takeout trays, produce clamshells, pie tins – so long as it’s shallow, round 1–2 inches deep). Guarantee you possibly can poke drainage holes within the backside as a result of good drainage prevents waterlogging. If utilizing repurposed meals containers, wash them properly and punch just a few small holes within the backside.
Additionally, you will want a second tray or plate with out holes to behave as a water-catching base. (Customary observe is a two-tray system: one perforated tray nested inside a strong tray. Set this up in your chosen spot – someplace you don’t thoughts getting moist or soiled. A windowsill, a kitchen counter close to the sink, or a small shelf with a develop mild are all nice choices. Tip: If engaged on a countertop, lay down a towel or mat to catch any spills of soil or water.
We extremely advocate investing in one thing just like the Bootstrap Farmer’s Passion Bundle. Click on right here to test it out.
2. Add Rising Medium:
Fill your tray (the one with holes) together with your rising medium of selection. The medium is usually a sterile soilless seed-starting combine or a pure fiber mat designed for microgreens. Most newcomers discover a mild potting or seed-starting combine works glorious—it holds moisture and offers the roots one thing to anchor in.
Goal for about 1 to 1½ inches of depth of soil combine within the tray. You don’t want quite a bit; microgreens have very shallow roots. Gently stage and tamp down the medium so you will have a agency, even floor to sow on. The soil must be moist however not muddy – if it’s dry, mist or sprinkle some water and blend it in beforehand. (It ought to really feel like a wrung-out sponge: damp, however no extra water dripping.) A pre-moistened medium helps guarantee all seeds have moisture contact from the beginning.
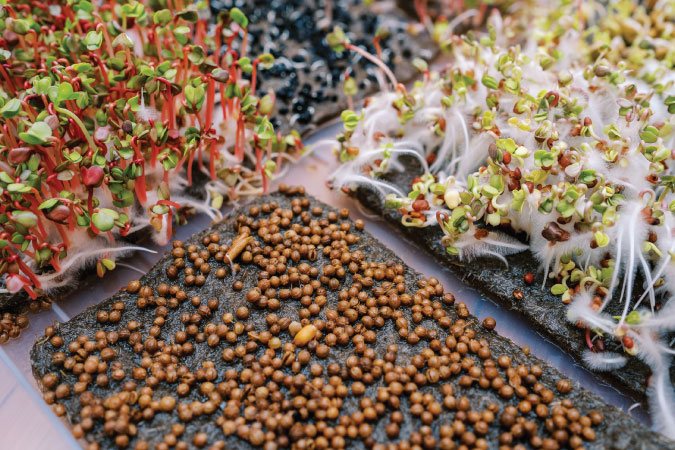
3. Sow the Microgreens Seeds Generously:
Now for the enjoyable half – planting the seeds! As a result of every seed will change into one microgreen, you’ll sow them a lot extra densely than in a typical backyard. Sprinkle the seeds evenly throughout your complete floor of the medium. You need a thick carpet of seeds, with most seeds about 1/8 to 1/4 inch aside. They are often shut, even touching, however keep away from massive clumps or piles of seeds on high of one another. An “even layer“ is essential– gently use your palm or a bit of cardboard to distribute seeds if wanted.
Don’t be shy about seeding; a skinny sowing will yield a sparse crop. For a small 5×5-inch tray, you would possibly use a tablespoon of small seeds, whereas a big 10×20 tray might take a number of tablespoons of seeds—precise quantities aren’t vital, however extra seeds = extra microgreens.
Planting massive seeds like sunflowers or peas requires soaking them in water for 6-12 hours first to jump-start germination. After soaking, drain and rinse the seeds, then sow as normal (massive seeds could be positioned by hand considerably evenly). This pre-soak step is non-obligatory however typically improves germination time and success for the larger seeds.
We love True Leaf Market Microgreen Seeds.
4. Press and Cowl (Non-compulsory):
Evenly press the seeds into the soil after sowing to make sure good seed-to-soil contact. You should use your fingers or a flat object to tamp them down gently. This helps the seeds keep moist from the medium under. In contrast to in outside gardening, you do not must bury the seeds underneath extra soil – most microgreen seeds germinate properly proper on the floor (and an excessive amount of soil on high can invite mould).
Some growers sprinkle a really skinny layer of dry vermiculite or soil on high to hug the seeds, but it surely’s not required, so we skip this step.
Cowl the tray to create a darkish, humid surroundings for germination. You possibly can cowl it with an upside-down similar tray, a plastic dome or lid, and even only a piece of cardboard. This “blackout interval” in darkness mimics being underneath the soil and encourages seeds to sprout robust, looking for mild. It additionally helps retain moisture.
DIY tip: For those who don’t have a tray lid, plastic wrap with just a few air holes or a clear kitchen towel can work, however monitor dryness.
5. Microgreens Germination Interval:
The seeds will germinate over the subsequent few days with the tray lined. Please preserve them in a heat spot (round 70°F is good) throughout this era. Verify on them no less than as soon as every day. Use a sprig bottle to mist the floor if it dries out. The aim is to maintain the seeds and the highest of the soil constantly moist (however once more, not drowning in water). Inside 2-4 days, you must see tiny shoots or stems pushing up. Completely different vegetation range: quick ones like radish or mustard typically sprout inside 48 hours, whereas massive seeds like sunflowers would possibly take 4 or 5 days. Be affected person. For those who use a strong lid, you’ll discover the seedlings might push it up as they develop – an indication they’re prepared for mild! Typically, as soon as most seeds have sprouted, or about 3-5 days in, it’s time to uncover the tray.
6. Uncover and Give Mild:
Once you take away the quilt, you’ll doubtless see pale yellow or whitish sprouts. Don’t fear – that’s regular. As a result of they had been at nighttime, they didn’t produce chlorophyll, so they appear blanched. Now could be the time to transfer your microgreens into the sunshine to inexperienced up and develop leaves. A easy mild like this one will just do positive for those who don’t have a sunny, south-facing window. Or, you can use lights like this one underneath for underneath cupboards or on a shelf.
Place the tray underneath your develop mild or in your vivid windowsill. If utilizing synthetic lights, preserve them fairly near the tops of the sprouts (just a few inches away if it’s a fluorescent or LED that doesn’t produce a lot warmth, or 6-12 inches for stronger lights.)
The sprouts will flip inexperienced rapidly, normally inside a day of publicity to mild, as they produce chlorophyll. At this stage, take away any humidity dome or plastic – your microgreens now not have to be lined, and also you favor contemporary air to stop illness.
7. Ongoing Care (Watering & Mild):
You’re within the progress section. Microgreens develop quick – you’ll be amazed how rapidly they shoot up. To maintain them blissful, guarantee they get loads of mild every day (typically 12-16 hours of sunshine, adopted by a interval of darkness to relaxation) and water them as wanted to maintain the rising medium moist.
An awesome technique is to water from the underside. As an alternative of spraying or pouring water on high (which may encourage mould or disturb the fragile seedlings), pour water into the underside (non-hole) tray and let the soil soak it up by the drainage holes.
After you uncover the microgreens, begin bottom-watering by including 1 / 4 inch of water to the underside tray and letting the soil draw it in for a couple of minutes, then pour off any extra. Backside-watering retains the foliage dry whereas hydrating roots. You possibly can sometimes mist from the highest if the floor appears dry – achieve this within the morning so leaves aren’t moist in a single day. Verify moisture every day; microgreens can dry out rapidly as a result of their root zone is shallow. But additionally be cautious to not overwater – don’t let the trays sit in standing water for lengthy intervals.
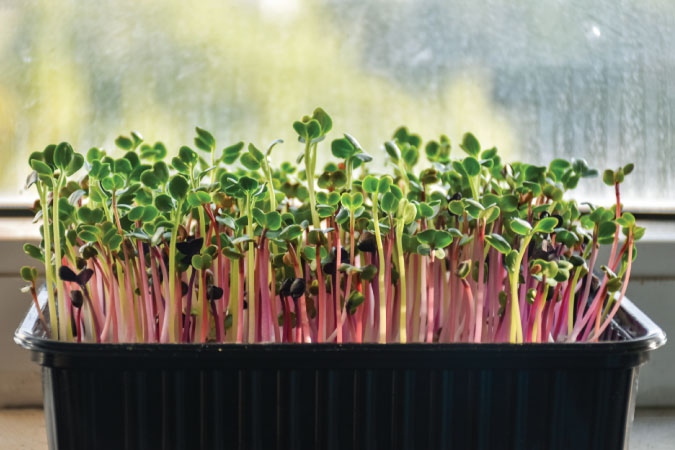
Good drainage and solely watering when wanted will stop most points. Additionally, guarantee some airflow across the greens. With correct mild and watering, you’ll see the cotyledon leaves absolutely increase and maybe even the primary tiny “true leaf” of the plant emerge. The microgreen forest will change into lush and normally uniformly inexperienced (some varieties, like cabbage or kohlrabi, have lovely purple hues, too).
8. Microgreens Harvest Time!:
Relying on the variability and situations, most microgreens are prepared to reap about 7–14 days after sowing. Some fast ones (radish, broccoli, mustard) could be prepared in as little as 7-10 days, whereas barely slower ones (sunflower, pea, basil) would possibly take 2 weeks or extra.
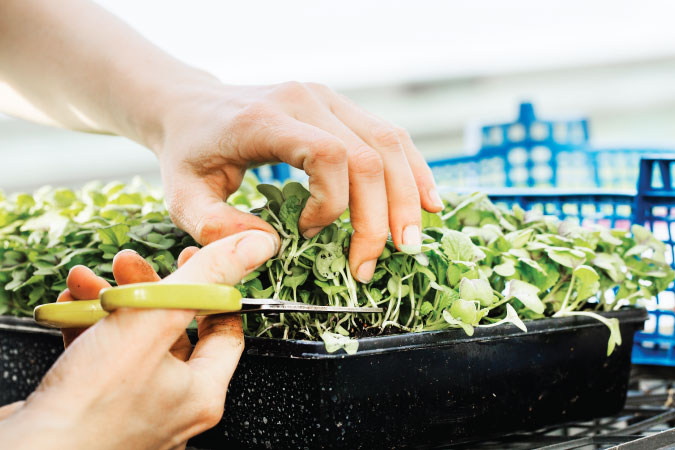
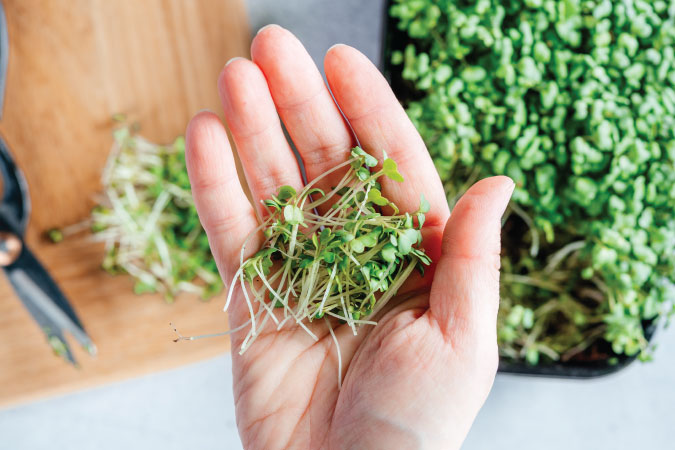
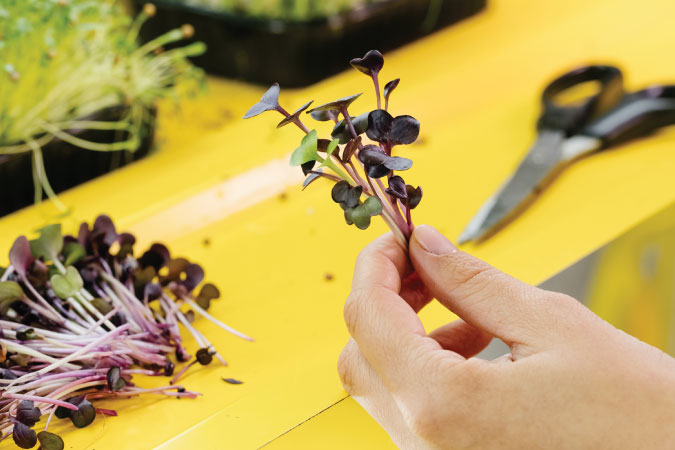
A common rule: harvest when they’re 1 to three inches tall and have no less than expanded cotyledons and sometimes a touch of first true leaves. For those who wait too lengthy, they will get harder or flop over, so earlier is normally extra tender. To reap, use a pointy pair of fresh scissors or a knife. Reduce the microgreens simply above the soil floor, greedy a handful gently as you snip. Strive to not pull them up (you don’t need roots or seed hulls in your combine). It’s finest to reap earlier than you utilize them for max freshness and vitamin. You possibly can harvest the entire tray directly or lower as wanted – however as soon as they’ve reached their prime, they don’t continue to grow new leaves (they’re seedlings, not like cut-and-come-again lettuce). So, it’s widespread to do a “clear-cut” harvest after which begin a brand new batch.
9. Put up-Harvest – Use or Retailer:
For those who’re consuming your microgreens instantly, give them a fast rinse in cool water to take away any bits of soil or seed hulls (particularly for these like sunflowers that will retain seed shells). Pat dry, or use a salad spinner to take away extra moisture. If you must retailer microgreens, line a container or zip-top bag with a paper towel, place the dry (not moist) microgreens inside, and refrigerate. Most microgreens can final about every week within the fridge when saved dry and funky – some sources say as much as 10 days, although they’re most nutritious and flavorful when very contemporary.
Delicate greens like amaranth or basil microgreens are finest used inside just a few days. Hardier pea shoots or sunflower shoots would possibly final nearer to every week. Keep away from crushing or packing them tightly in storage to stop rot.
10. Clear Up and Begin Once more:
One of many joys of microgreens is the fast turnaround – you possibly can instantly begin one other tray and have a steady provide. After harvesting, you’ll be left with the tray of roots and spent soil. You typically can’t reuse that soil for an additional spherical of microgreens as a result of it’s filled with roots and depleted of straightforward vitamins. Dump the used medium out – ideally right into a compost bin. (The outdated roots will break down into fantastic compost, which you’ll be able to later use in your outside backyard or potted vegetation, finishing the cycle.
Clear your trays with heat water (or a diluted bleach resolution for those who suspect any mould points), and also you’re able to sow the subsequent batch! Many homesteaders get within the behavior of beginning a brand new tray every week for a steady weekly harvest of microgreens.
That’s it – you’ve grown your microgreens from begin to end in your house. When you get the cling of the method, you possibly can stagger plantings (begin a brand new tray each few days) to have an virtually every day provide of contemporary greens. It’s a easy cycle: sow, develop, harvest, repeat – excellent for a self-reliant residence gardener.
Learn Extra on this Collection:
Widespread Microgreen Rising Issues: A Troubleshooting Information
The High 5 Best to Develop Microgreen Varieties for Newcomers
Harvesting and Storing Microgreens
Our Favourite Microgreens Provider:
(Visited 1,976 occasions, 5 visits at the moment)


